by Team Snapbac
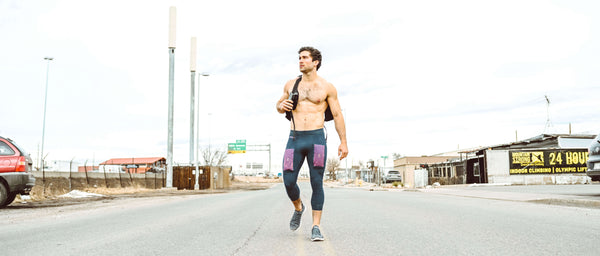
What makes an athlete? It’s not the money, the social status, the gym membership, the specialty training or the gear and equipment, although all those things are nice. An athlete is the person, someone who has decided at all cost they are going to dedicate their body, mind, time, energy, and, at times, life to a physical endeavor. They sweat, bleed, and snap tendons and bones pushing themselves past their point of breaking to see what’s on the other side. They look at what they have achieved and decide they can still do better. Every bite is measured and accounted for; every hour at the gym is an hour less in their daily lives. Being an athlete means full immersion into the challenge with no regrets, doubts or looking back. It means training at home, at the gym, with your team, friends and colleagues. If your goal is to be a pro-athlete, it means costs, gear, training equipment, coaches and practice space. Going for pro-football is a challenge that will require your body, your mind, and your bank account! If you’re not quite there yet, you can still use a little creativity and some manual ingenuity to make your own football training equipment and practice gear.
Training at home is required whether you have a million dollar, in-house gym, or a modest DIY set-up in your garage, and if you know how to train, a homemade version can be just as successful. Take a look at some clever ideas to get the workout you need while on a budget.
You’ve probably heard of the rice challenge, but if not, this little training tip can offer up huge gains in grip and forearm strength. Look for any plastic bucket with a circumference similar to the size of a barrel or outdoor garbage can. Cut the height down to about 18 – 22 inches, or deep enough that when your fingertips touch the bottom, the side edge of the bucket comes up to your mid-bicep. Now fill this bucket with sand or rice, whichever is easiest and cheapest to find. Sand provides a bit more resistance, but it can be dusty. Playground sand is the best option, but beach sand is free if you happen to live nearby. Rice is cheap, but it will need to be replaced as it collects moisture from sweaty palms and arms and eventually can become gummy. In regards to training, either will work just fine.
Now you’re ready to start working out your hands and forearms. To begin, dig your hands down into the sand or rice until your it comes up to your wrists. This alone will take a little effort. When completely submerged, begin to open and close your hands. Make them into tight fists creating a compacted ball of sand or rice in the middle of your hand and then open them wide extending your fingertips all the while keeping them buried.
To build up wrist strength, push your hands straight down, fingers straight and spread out, until the rice or sand just comes to your wrist and begin to move your hands back and forth bending at the wrist but not moving your arms. Then work on moving from the wrist left to right.
Widening your grip when working with weights is a great way to increase grip strength and challenge your muscles in your fingers and hands with a fatter handle. If you’re not able to buy a new set of wide handled dumbbells or a set of Fat Gripz, you can still get this training with a little at home equipment modification.
Head to the store and buy one of those foam pool noodles that have a hole through the center. Using a utility knife or box cutter, slice the noodle into sections as wide as the handles on your barbells, or if you’re cutting them for a bar, measure your hand grip and add one inch on each side. Then make one slice down the side so you can pop the foam segment over the handle, running the metal through the center of the tube. There will be a slight gap. Simply lift with that gap on the inside of your palm. Your hand strength should squeeze it together. Now you can do wide grip lifts.
Your hands and forearms are getting a workout, but now it’s time to work on something many athletes forget, your pinch strength! Don’t let the defense slide through your fingers or the ball power right past your grip. Making a variety of pinch blocks is cheap, easy and fast. Head down to your hardware store and ask about scraps of wood. Ideally you want several different cuts of a 2 x 6, which is actually sized at 1.5 x 5.5. You can buy one 2 x 6 plank and cut it down if scraps are not available.
To challenge yourself, you want varied widths and lengths. Cut six sections of the board into 10 – 12-inch pieces and two sections into 30-inch pieces for a two-handed pinch. Most major hardware stores will make the cuts for you if needed. The first pinch block will simply be the 1 ½ inch plank, then with wood glue, glue two boards together to make a 3-inch pinch and glue three boards together to make a 4 ½ inch pinch. For the two-handed pinch, glue the two 30” boards together. Using 2 - 2.5” wood screws, secure the glued pieces by screwing them together in all four corners. Do not use longer screws that go through to the other side.
You will also need four heavy duty eye bolts with weight ratings at 100 pounds or more. Place a mark at the center of the grip and pre-drill to avoid splitting the wood. The pre-drilled hole is very important on the 1.5” board and the 3” board as the hole will be between the two planks where they are joined. Place the eye bolt in the center and screw it in. When it gets too tight to continue by hand, place a screwdriver through the hole and use it as a crank to secure the bolt deep in the wood.
Next you will need four carabiners, or climbing hooks, to put through the eye bolts. And lastly, you can opt for chain or four 10-12” eyebolts, but depending on the amount of weight you want to train with, you may need forged steel, galvanized eyebolts, and those can get costly. Chain is the better option for heavy weight plates.
If you choose eye bolts, be sure to get secure washers and heavy-duty bolts. Feed the eye bolt through the hole on the weight plate and secure with the washer and bolt.
If you choose chain, feed it through the hole on the weight plate and secure the ends to the carabiner. Either way, you are ready for single and double hand pinch training!
It’s amazing how the simple things can be so effective, like a reaction ball. These small, knobby balls are great practice for speed, agility, hand-eye coordination, lateral foot movement and overall reaction times. They aren’t expensive and can usually be found for around $10 dollars, but you could make one for fifty cents!
Go to any store and buy a rubber bouncy ball about the size of a lemon. If you want to challenge yourself even more, buy a couple of the small bouncy balls around the size of a cherry! When you return home, take a utility knife or box cutter and start shaving off bits in flat slices creating angles around the ball. It doesn’t need to be in any particular pattern or shape as long as there are blunt lines like a hexagon.
When you bounce these on the floor, they are going to have the same effect as a reaction ball. The angle they return will be unpredictable and keep you on your toes.
If your training budget is maxed out, this can be a great option for those who have a little handiness in their genes. Sure, using the available blocking sled equipment at your school football field may be an option, but if not, you’ll need to get creative. The trickiest part is acquiring the shopping cart, but you may find stores willing to donate one if you are making equipment for a local team.
Remove the wheels from the cart and secure it to two 4x4s across the width at the front of the cart and the width at the back of the cart. Then attach the two 4x4s to two 2x4s running along the length of the cart like sled rails. They should not be longer than the back of the cart but should extend 1 ½ - 2 feet from the front of the cart. Under the front end of the two 2x4s, place a 5-foot cut of 3” PVC pipe. Secure the boards to the pipe.
Secure a foam pad to the back of the shopping cart being sure to fully cover any sharp edges. When you are ready to really challenge yourself, start loading up the shopping cart with weight plates or rocks!
Stepover bag drills are essential for defensive linemen to develop rapid footwork, open hips and acceleration, but buying football stepover agility dummies as training equipment can get really expensive when you need six to ten of them! Luckily, they are quite easy to make.
Head back to your dollar store for more of those foam pool noodles that kids like to float around on. With a little glue or epoxy, you can stack them up as high or wide as you want but a good size to start with is 10-12” high and 17-18” wide base with one noodle less at the top creating a tapered width.
You can easily modify them to stand on their own for a tackling dummy as well. First, you will need to weight it down, so you can fill the noodles with sand or pour liquid cement in the center tubes. Do not fill the outer tubes as you want the cushioning for the blow, and you don’t want to make it too heavy to lift. If you are trying to create a 200-pound lineman, then add more tubes to the middle and make a wider bag. To keep the sand in the tubes, you can make small plugs out of nearly anything and glue them in the ends. Find a 1-2” heavy duty, firm, foam sheet and cut it to the shape of your noodle stepovers and glue them to the ends.
Though a bit more costly, you can also buy an empty heavy duty, pro-punching bag for around $30 dollars. This can be filled with sand, rice, beans or for a softer impact old clothes. Shredded towels, sheets, blue jeans and materials make for a realistic impact.
Stepover bags are not the only equipment for training foot drills. Cones or pylons are the classic choice when laying out patterns and Xs for speed and acceleration with agility training. If you don’t have a stack laying around your garage, then choose absolutely anything to mark off a training drill. You can use dish rags, rocks, colored tape, tin cans, literally anything. You do want to avoid glass or pointed objects in case you misstep or fall.
Our last piece of DIY football training equipment is the simplest and requires nothing more than a bicycle pump. When it comes to safe tackling practice, a football tackling ring is essential, but they are also extremely expensive! If you don’t have $300 - $500 dollars to spend on a foam donut, then opt for the $30 dollar choice, a commercial grade rubber snow and rafting tube. These black rubber rings can take a pounding, don’t pop, come with new safety valves that are inside the tube instead of the old metal stem poking out at you and can be easily patched with duct tape and tube kits.